The next section Add Players to Roster, is a faster way to add players in bulk to a roster. It starts off by explaining the help button in the right top corner. This help button pulls down a great dialogue on how to use this section and others. Underneath the explanation is a select drop-down option to select which team you want to add these players to.
When done adding players, don't forget to click the blue Add Players button at the bottom.
The next section Edit Rosters is self-explanatory. Again also has a help option in the top right corner.
The Settings section has a multitude of options to get the look and feel you want. The four tab sections allow you to do various things such as set what order to display the players, set the color scheme, and what stats to display among other options.
The last section CSV Import, gives you options to import CSV files of your teams and/or players.
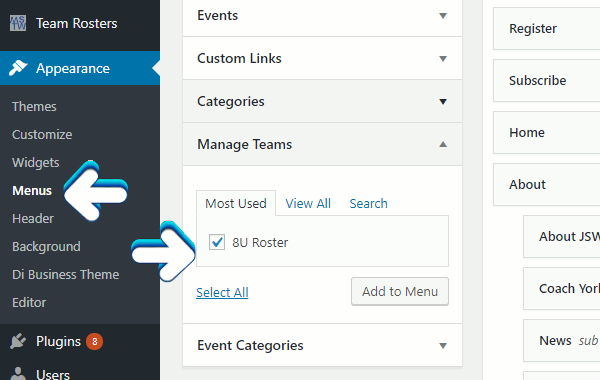
Once you are completely done with using the Team Roster plugin, you can add a team to the menu on your website. On the left-hand side navigation menu in the WordPress Admin, hover your mouse over Appearance and select the Menus option. Then under the Manage Teams section, click the checkbox next of the team you want to add to the menu and then just click the Add to Menu button. You will see your team added at the bottom of the menu list. Lastly when you're all done click the Save Menu button.

For more on how to add links to your WordPress menu, see our article
www.stackmediadesign.com/index.php/knowledgebase/12/Configuring-the-navigation-menus-in-WordPress.html
Author: Jesse Lange
