This article covers some of the basics of using the Woocommerce Advanced Shipping plugin by http://jeroensormani.com/.
First you must install the plugin onto your WordPress site and have the Woocommerce plugin installed too. For more on how to install plugins please check out our article:
https://www.stackmediadesign.com/index.php/knowledgebase/7/How-to-install-WordPress-plug-ins.html
I will use an example to demonstrate how the plugin works. Lets say a company wants to setup the checkout process where in certain areas the company can deliver their products directly to your home through their own delivery drivers. Using this plugin we can set what areas they are and will only be shown to the customer if they enter in a specific state and zip code during checkout. Lets use Toms River, New Jersey as out state and their zip code 08753.
Start off by going to the Settings section of Woocommerce.

Followed by going to the Shipping tab and then to the Advanced Shipping section.

Make sure the first option is selected to enable the advanced shipping. Below that option is the abiltity to disable all shipping methods if free shipping is available.
Next go ahead and click the Add Shipping Rate button.
For the title enter in Toms River NJ. This title will not appear anywhere on your website. This is a title just a reference for later on when you want to select it for editing or deletion if needed.
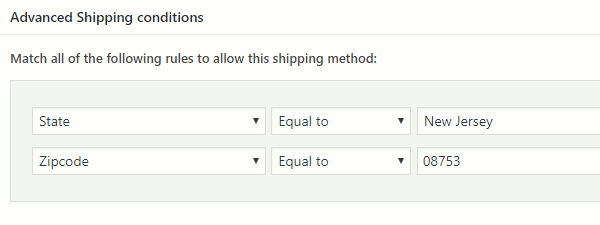
Under the Advanced Shipping Conditions section you will see 3 input fields. Go ahead and set the first one to State. Next one Equal to and the last one to New Jersey.
Next go ahead and click the plus button to add the zip code condition. Set these three input fields to ZIP Code, equals to, and 08753.

Now in the Shipping Settings set the title. This title will appear during checkout in the shipping options area. Go ahead name it Home Delivery or whatever you like.
Lastly set your prices for this shipping option. Now when a customer enters in New Jersey and the ZIP Code 08753, the shipping method we set for Toms River should appear.
If you want to add more delivery areas, just go back to the plugin's main screen and click the Add Shipping Rate button. This way you can have as more areas with diffferent or the same rates and conditions.
Author: Jesse Lange
